


Hi everyone! 👾
Long time, no blog. Back after a long time of pampering following the exams and a college fest 💆🏻. So, let's pick up from where we left off.

Contents 📜
Routing
In the previous post, we made our very own simple web server. Have you wondered what happens when we change its URL to something else? (Like https://127.0.0.1:8000/overview)
Well if you do so, you'd see no difference.
But to be able to display another page (like an overview page) or perform any other actions, we would need to route them.
In simple words, routing is implementing different actions for different URLs
To do this, we first need to require yet another built-in Node.js module, the url module. Before using this module, let's first set up a few things.
When we console log req.url in createServer(), restart the server and refresh the page, we see two lines: / and /favicon.ico in our terminal. What're these?
const url = require('url');   //require the url module

const server = http.createServer((req, res) => {
    console.log(req.url);
    res.end('Hello from the server!');
});

server.listen(8000, '127.0.0.1', () => {
    console.log('Listening to requests on port 8000');
});
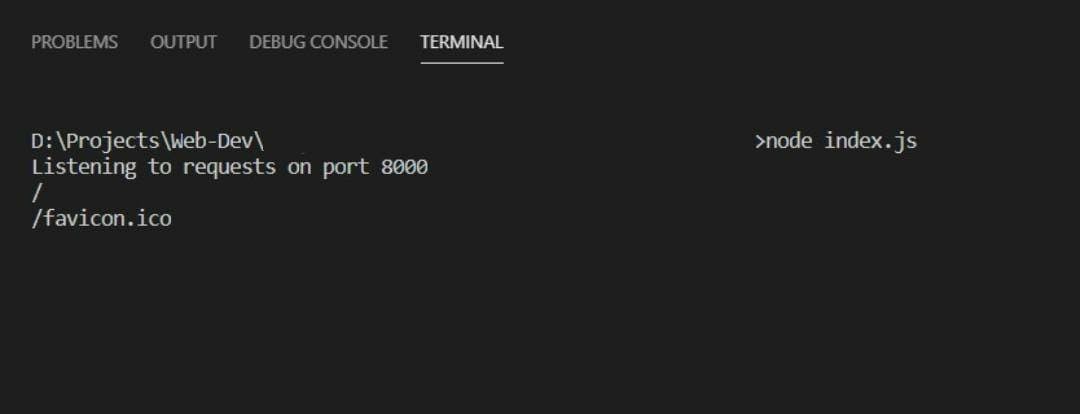
Since there are two lines of output, it is obvious that the callback function in createServer() was called twice. / is the URL of our home page and /favicon.ico is an automatic request that the browser makes to fetch the favicon of our webpage.
You might have seen URLs like shopping.com/product?id=12&abc=3456. By using the url module, we can parse these parameters(id, abc) and their values to get something meaningful out of it.
Let's now create a few routes. To do so, you just need to add an if-else block like this:
const server = http.createServer((req, res) => {
    const pathName = req.url;    //store the url
    if(pathName === '/' || pathName === 'overview') {
        res.end('This is the OVERVIEW!');
    } else if(pathName === 'product') {
        res.end('This is the PRODUCT!');
    } else {
        res.end('This page cannot be found.');
    }
});
When an invalid URL is requested, we can send the status code (e.g., 404, 200 etc) to the browser/client using writeHead(). This function takes in the status code and an object of standard/custom headers. A header is just a piece of information about the response we're sending back.
const pathName = req.url;
    if(pathName === '/' || pathName === '/overview') {
        res.end('This is the OVERVIEW!');
    } else if(pathName === '/product') {
        res.end('This is the PRODUCT!');
    } else {
        res.writeHead(404, {
            //standard header
            'Content-type': 'text/html',    //response will be an html tag
            'my-header': 'hello-world'     //custom header
        });
        res.end('<h1>This page cannot be found.</h1>');    //html tag as response
    }
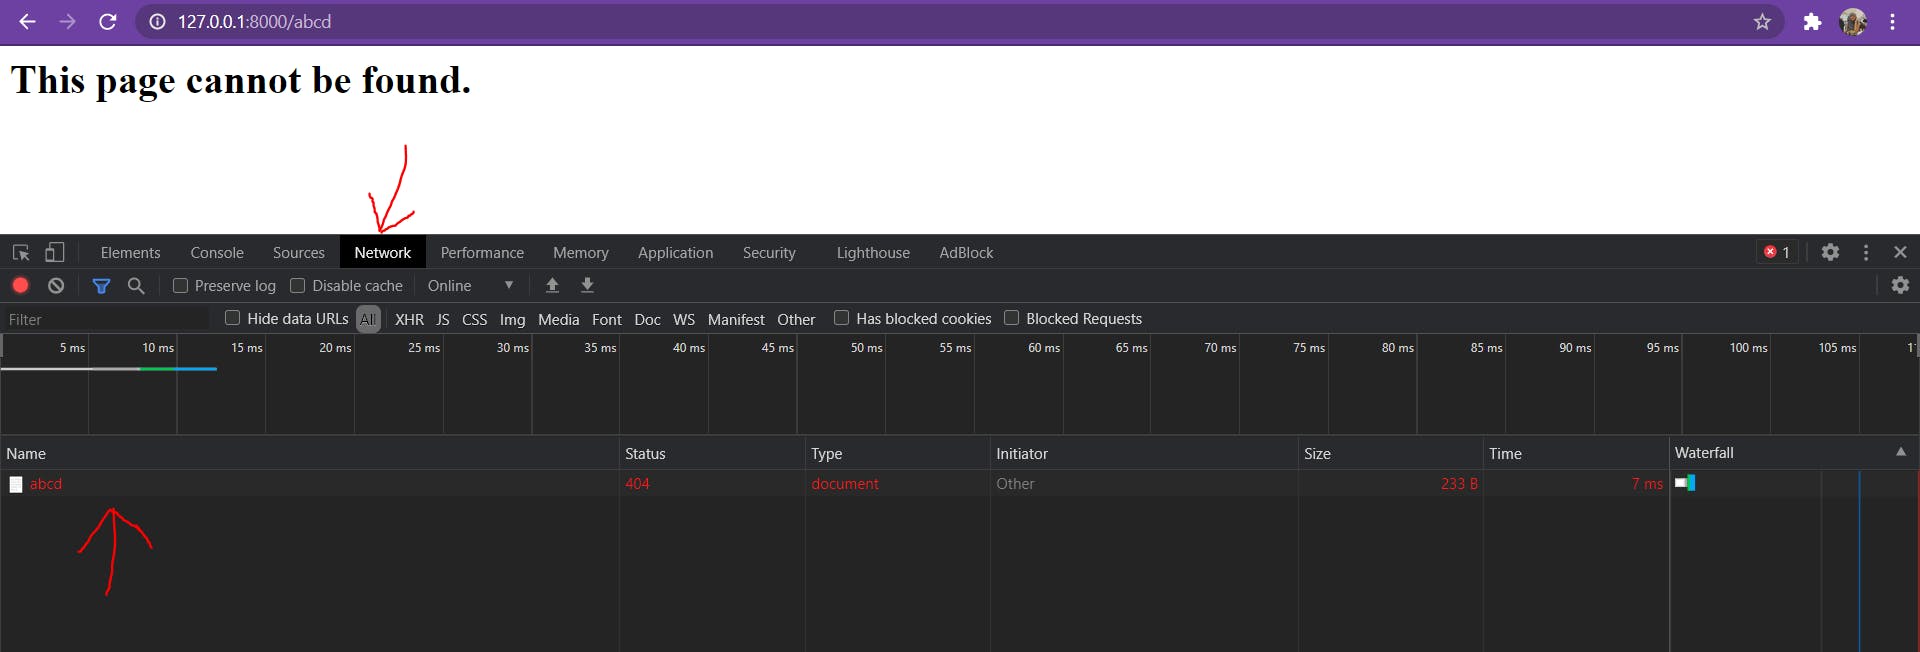
Let's see how this works by requesting an invalid URL. Do not forget to restart your server and refresh the page after making changes to your code
Hit Ctrl+Shift+I to view Chrome Developer Tools (or open Dev Tools in your browser). Refresh the page and go to the Network tab to see the errors.
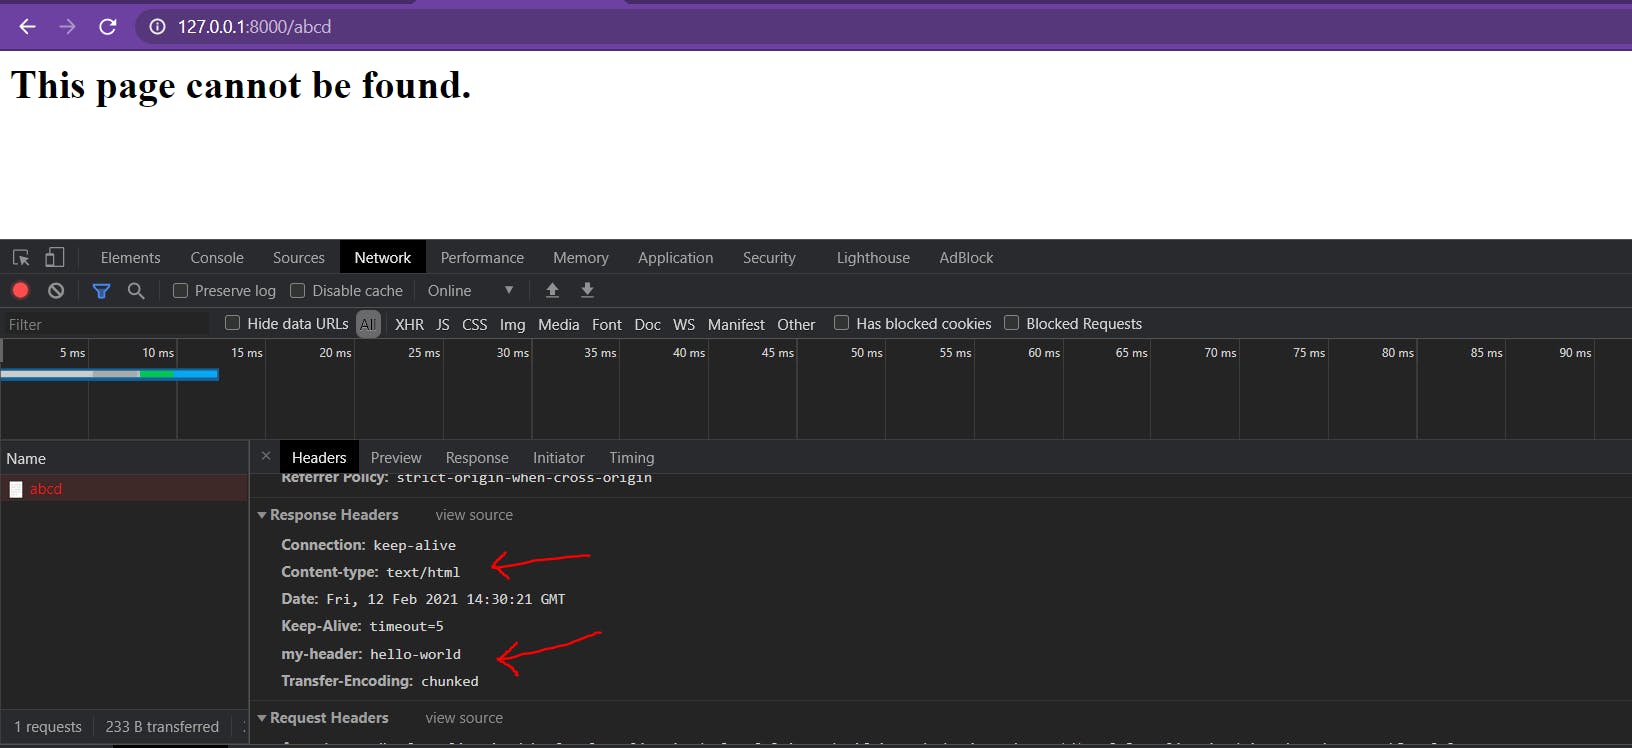
Now click on the error to see the headers(scroll down to see Response Headers) we specified in the above code.
In real-world applications, routing can get really really complicated and this can be tackled through the use of a tool called Express 🚄

Creating a (simple) API
Up until now, our pages have only displayed simple strings and/or html tags. What if the user is requesting some data? Who would provide it? 🤨 An API would!. 🎉
In simple words, an API is a service from which we (the user) can request some data 🗄️

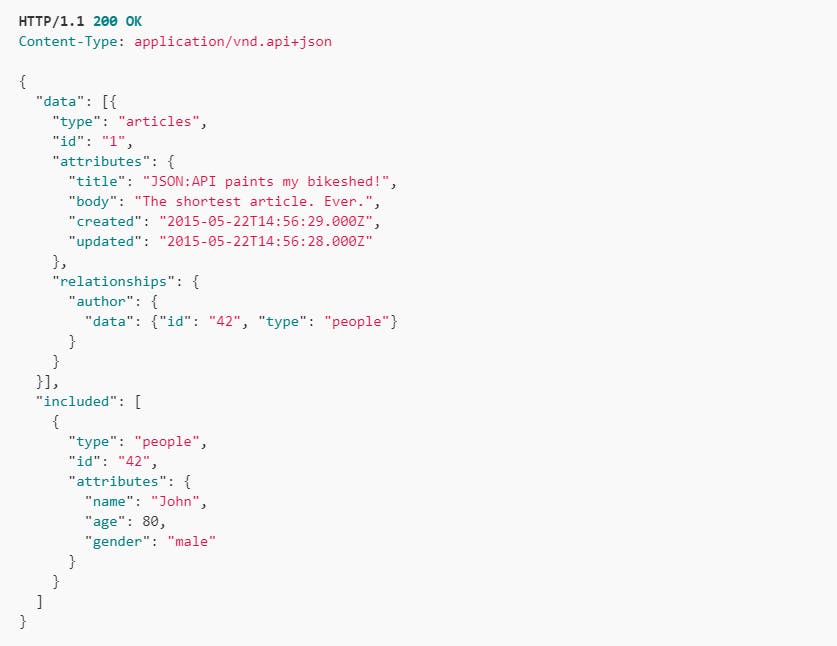
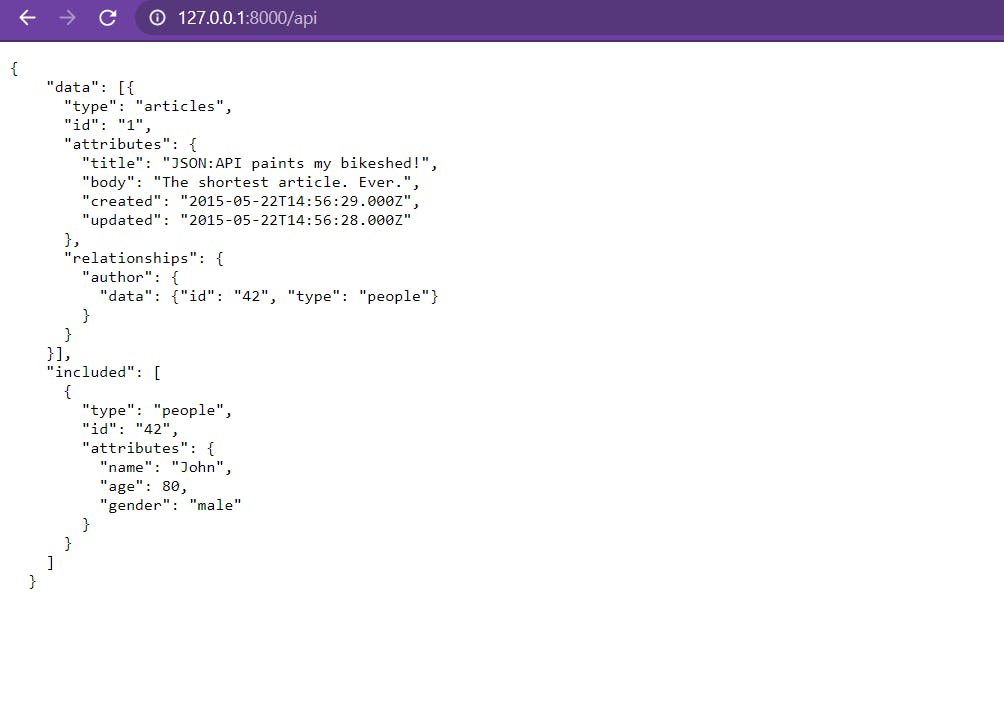
We provide this requested data in a .json file. A JSON file is a simple text format that looks a lot like a JavaScript object. It has a huge array with elements as objects. These objects have string type keys and corresponding values.
An example JSON file would look like:
To create an API, we first have to read the data inside JSON file synchronously and then parse it into a JavaScript object using JSON.parse(data). This object can be used when we implement HTML Templating (We're gonna learn this in the next section).
But wait, we already know that synchronous code is blocking code. Why would you read the file synchronously then? 🤔

💡 Here's why:
Any synchronous code written in the top-level of the program does not block execution of our code. When we read the JSON file, we will have to store the data into a variable. This can only be done if you read the file synchronously. Moreover, the callback function inside createServer() is what's going to be called every time the user requests a different URL. Hence, reading the file synchronously here is suitable.
Let's take a look at the code for creating our simple API.
const data = fs.readFileSync(`${__dirname}/dev-data/data.json`, 'utf-8');
const dataObj = JSON.parse(data);

const server = http.createServer((req, res) => {
    const pathName = req.url;
    if(pathName === '/' || pathName === '/overview') {
        res.end('This is the OVERVIEW!');
    } else if(pathName === '/product') {
        res.end('This is the PRODUCT!');
    } else if(pathName === '/api') {               //URL for API
        res.writeHead(200, {'Content-type': 'application/json'});   //standard header
        res.end(data);
    } else {
        res.writeHead(404, {
            'Content-type': 'text/html', //standard header
            'my-header': 'hello-world'
        });
        res.end('<h1>This page cannot be found.</h1>');
    }
});
In the first two lines, you can see that we have stored the data from our JSON file. This data has been parsed using JSON.parse() that returns a JavaScript object (an array in this case).
You might wonder what __dirname (with two underscores in the beginning) is. 💭
Well, __dirname is a variable that can be accessed by any of our Node.js scripts. It translates to the location where the file is stored. A dot in the file path corresponds to the location where the node index.js command is run to execute the file. But, what if we want to run the file from a place where the file being run is not present? In that case, the __dirname variable comes handy. It is a best practice to use this every time we specify a file path.
Next, you can observe that we have added another else-if condition for the api route. Here, we're going to send the data from our JSON file to the server through res.end() (it accepts a string as parameter). But, before sending this response, we are going to inform the browser about what kind of data that is we're sending by using a standard header.
HTML Templating
Now that we know our JSON file contains information of our products, we can start making dynamic and reusable templates out of our HTML code.
For e.g., say we have a website with 10 product cards. The information that goes into the card is present in our JSON file. What if we remove/add few of these cards from our JSON file? How would we remove/create these cards on the frontend dynamically? Well, the answer is, HTML Templating.
Step 1: Building the Templates
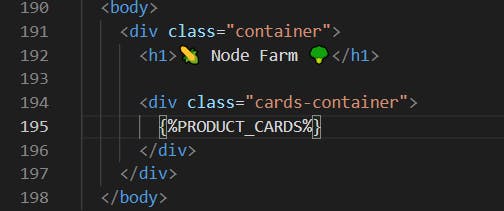
Replace the text we want to add dynamically with a placeholder. Make sure your placeholder doesn't contain any symbols that are part of your HTML code to avoid replacing something that's needed on the page. A general rule of practice is to use this syntax: {%PLACEHOLDER_NAME%}.
For e.g., here I have replaced all the cards in my page with the placeholder {%PRODUCT_CARDS%}.
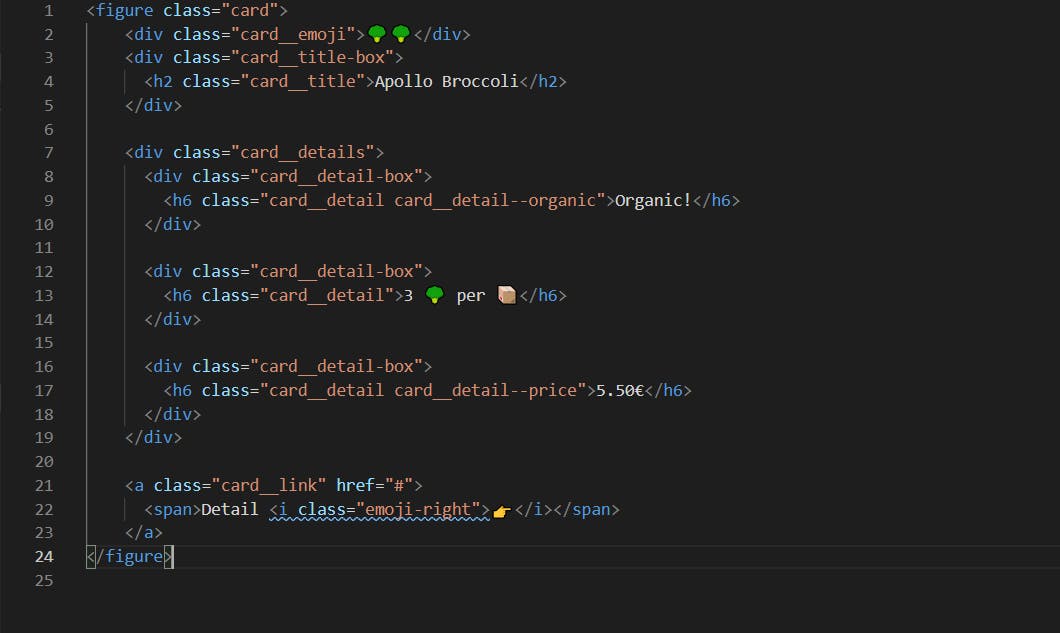
In another file (template-card.html), I have a single card that will be used as a blueprint to make as many cards as needed dynamically.
Since this card is going to be used as a blueprint, the information inside the card also needs to be replaced by placeholders. So, after adding placeholders, here's how it looks:
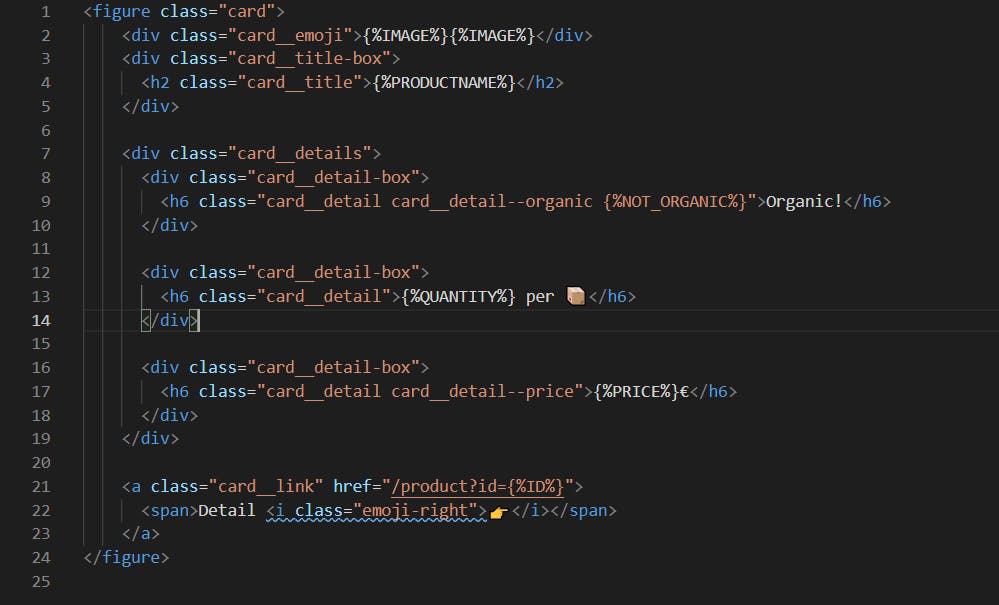
Note: The anchor tag in line 21 has an href link that includes ID as a placeholder. This basically means that each card(or each product) has a unique ID in our JSON file. These IDs will be used in routing and uniquely identifying each product.
Note: CSS classes and IDs can also be replaced with placeholders. These are particularly useful when we want to style elements based upon their category.
Step 2: Filling the Templates
Here comes the most important step: replacing the placeholders with actual content.
So, when a URL route is requested, we read the template synchronously (because the template is always the same so we can read and store its contents in a variable in the beginning of the application and load its contents when requested), fill it dynamically with our content and then send it back as our response.
Let's see how this is done using an example:
const replaceTemplate = (temp, product) => {
    let output = temp.replace(/{%PRODUCTNAME%}/g, product.productName);
    output = output.replace(/{%IMAGE%}/g, product.image);
    output = output.replace(/{%PRICE%}/g, product.price);
    output = output.replace(/{%ID%}/g, product.id); //regex /g global flag

    return output;
}

const tempOverview = fs.readFileSync(`${__dirname}/templates/template-overview.html`, 'utf-8');
const tempCard = fs.readFileSync(`${__dirname}/templates/template-card.html`, 'utf-8');

const data = fs.readFileSync(`${__dirname}/dev-data/data.json`, 'utf-8');
const dataObj = JSON.parse(data);

const server = http.createServer((req, res) => {
    const pathName = req.url;

    //Overview
    if(pathName === '/' || pathName === '/overview') {
        res.writeHead(200, {'Content-type': 'text/html'});
        const cardsHtml = dataObj.map(el => replaceTemplate(tempCard, el)).join('');
        const output = tempOverview.replace('{%PRODUCT_CARDS%', cardsHtml);

        res.end(output);

        //API
    } else if(pathName === '/api') {
        res.writeHead(200, {'Content-type': 'application/json'});
        res.end(data);

    //Not Found
    } else {
        res.writeHead(404, {
            'Content-type': 'text/html', //standard header
            'my-header': 'hello-world'
        });
        res.end('<h1>This page cannot be found.</h1>');
    }
});

server.listen(8000, '127.0.0.1', () => {
    console.log('Listening to requests on port 8000');
});
Let's breakdown the huge piece of code above and understand what it does.
As we can see, tempOverview and tempCard contain the contents of overview and card template files. dataObj contains the object(an array in this case because our JSON file contained an array as well) that was parsed from our API.
When the /overview route is requested, we first let our browser know what type of content we are sending through a header. Next, we iterate through each element present in dataObj using map() and replace the contents present in the template card with replaceTemplate(). Lastly, we convert cardsHtml into a string using join() which is then used to fill in the cards on our overview page. Now we just send the replaced output as our response.
Phew! That did seem a lot but if you break it down to smaller chunks and pay close attention, it's just replacing the placeholders and sending the actual content back dynamically.

You can find more about the functions used here in the Resources for You 🎁 section.
Resources for You 🎁
- Read the documentation!


You've reached the end of the article! 🎉 Thanks for sticking about. Hope you enjoyed this post and learned something 💡 Please do leave your doubts (if any) and feedback in the comment section. Stay tuned for the next post! 👻🚀