


Hello again! 💛
Hope you have installed Node.js and have played around with REPL. If not, I've got you. Here's the link for the previous article. 🤖

Contents 📜
Reading and Writing in Files 📝✍🏼
We know that Node.js allows us to perform multitude of operations that are hindered by web browsers. Node.js works on the concept of modules where each module has a set of functionalities.
File I/O operations are carried out using the
fsNode.js module.
To use a module, we need to require it first using the require method.
Now, to read a file synchronously, we use readFileSync().
Syntax: readFileSync(relative-file-path, encoding)
It takes the path of the file to be read as its first parameter and returns a string when character encoding is provided as second parameter otherwise it returns a buffer.
After reading the file, if we wish to write that data into another file, we would use writeFileSync().
Syntax: writeFileSync(output-file-path, data, options)
It takes the path of the file where the data has to be written as the first parameter, data that has to be written as the second parameter and optional parameters for character encoding, mode, flag etc.,
It doesn't return anything meaningful. It throws an Error object if something goes wrong. 💥
const fs = require('fs');    //require the module

//Blocking, synchronous way
//reading the file
const textIn = fs.readFileSync('./txt/input.txt', 'utf-8');
//text to be written in the destination file. This is ES6 syntax.
const textOut = `Text present in input.txt: ${textIn}\nCreated on ${Date.now()}`;
//writing in the file
fs.writeFileSync('./txt/output.txt', textOut);

console.log('File has been written!');
Check out the official documentation to know more.
Asynchronous Nature of Node.js
Note: This section is just an overview of blocking, non-blocking code and callbacks. These concepts will be discussed in much greater depth in my future posts. For now, we can roughly visualize the concepts and get a basic understanding.
You might have wondered what the word synchronous that is mentioned in the above section meant. Let's figure that out.
In the piece of code written in the last section, the code is executed line-by-line. Basically, each line of code waits for the result from the previous of code. This is how the so-called synchronous way of writing code (blocking code 🚫) works.
This can be problematic for slower operations 🐌
Le Node.js:

Asynchronous, non-blocking code makes the heavy work be handled in the background. Rest of the code present below is meanwhile executed. A callback function that we list before, is called when the heavy work is done and the result is controlled by it. Sounds awesome right? ✨
What's the problem with blocking/synchronous code though?

If you remember from my last blog post, Node.js runs on a single-threaded model. It means that in our Node.js process (where the code is running) there is only one thread (think of a thread as a set of instructions that are run in a CPU). It's just how Node.js was designed 🤷🏻♀️. This means that all the users using our application have access to the same single thread. The code for these users will be run in the same thread present in the computer running the application.
For e.g., if a user blocks the execution with a synchronous piece of code, all the other users have to wait until that execution is completed. This can lead to terrible user experience when our audience is in millions or even thousands. Asynchronous code on the other hand, manages the tedious work in the background and lets other users interact with the application. Once that tedious work is done, a callback function brings back the result for that user.
This is what was meant by non-blocking I/O model that was discussed in the previous article. This is why we use so many callbacks in Node.js and is the reason why Node.js lets us build high performant and scalable web applications.
💡 Remember: Simply using callback functions doesn't make our code asynchronous. It works this way only for some functions in the NodeAPI like readFile() and many more as we will explore in coming posts.
Callback Hell
One last thing to make ourselves familiar with before we see how asynchronous code looks like, we need to know what a callback hell is. 😈🔥

Callback hell consists of nested asynchronous functions which depend on each other. It is recognized by the triangular sign and makes our code unmanageable and hard to read.
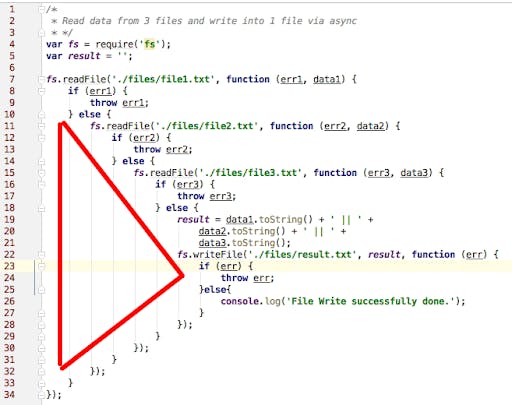
To escape callback hell, we can use more advanced techniques to handle asynchronous code like ES6 Promises or Async/Await which makes it easier to deal with the code.

Let's Write some Asynchronous Code! 👩🏻💻
So, to read files asynchronously, we use readFile() from fs module.
Syntax: readFile(relative-file-path, encoding, callback-function)
A typical callback function has two arguments: an error and the data itself. It is important to note that error always has to be the first argument. The data argument is optional.
For e.g.,
fs.readFile('./txt/file.txt', 'utf-8', (err, data) => {
    if(err) console.log('ERROR! 💥');
    console.log(data);
});
console.log('Reading file...');
The syntax followed in this and upcoming examples will be JavaScript ES6 syntax.
Here, the file will be read in background and Node.js will not block the code underneath it. Hence, the first message you will find on your console would be 'Reading file...' and then you would be displayed with the contents (i.e data) inside file.txt
To write into files asynchronously, we use writeFile() from fs module.
Syntax: writeFile(output-file-path, data, encoding, callback-function)
To understand easily, let's see this example:
fs.readFile('./txt/start.txt', 'utf-8', (err, data) => {
    fs.writeFile('./txt/final.txt', data, 'utf-8', err => {
        console.log('Your file has been written!');
    });
});

console.log('Will read file!');
In the above code, the first message we encounter will be 'Will read file!' because the file is being read asynchronously. Once that is done, the callback function from readFile() is called; which has an asynchronous writeFile(). After that, we are displayed with the message 'Your file has been written!' in the console.
Creating a (simple) Web Server
Roll up your sleeves because now we're making something really interesting! 👩🏻🔬
To create a web server using Node.js, we need to require (just like we required fs module) http module that gives us networking capabilities. This server is capable of sending requests and accepting responses from the client side.
To actually create a server, we use createServer() from http module. This method consists of a callback function that gets fired each time a request is made. This callback function has access to the most fundamental objects: request and response. The request object holds variables for requesting url and bunch of other stuff. The response objects provides us with many tools to send response to our server. The .end() method being the simplest of them all.
const http = require('http');    //requiring the module

const server = http.createServer((req, res) {
    console.log(req);    //to see the contents of req object.
    res.end('Hello from the server!');    //sending response via .end()
});
After creating the server, we need to start listening to requests using listen().
Syntax: server.listen(port, host-IP-Address, callback-function)
port: We commonly use the 8000 port in Node.js (think of a port as a sub address on a certain host)
host: This is an optional parameter as local host is automatically set by default here. The local host is basically your current computer where the program is being run. It can be mentioned explicitly as well. Its IP Address is
'127.0.0.1'.callback-function: An optional callback function is a common practice to console log that the server is up and running.
const http = require('http');    //requiring the module

const server = http.createServer((req, res) {
    console.log(req);    //to see the contents of req object.
    res.end('Hello from the server!');    //sending response via .end()
});

server.listen(8000, '127.0.0.1', () => {
    console.log('Listening to requests on port 8000.');
});
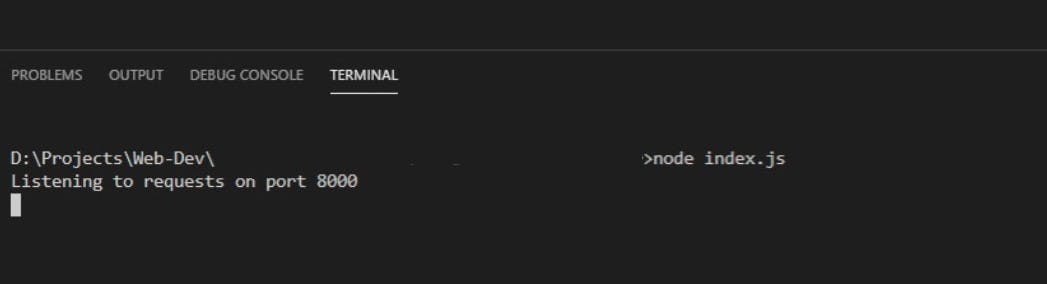
Now that we are all set up, we can save our program and run the command node index.js as always to run our application (considering you have named your file as index.js). You will find this in your terminal:
Open up your browser and type 127.0.0.1:8000 in your url search bar to open our newly created server and find this:
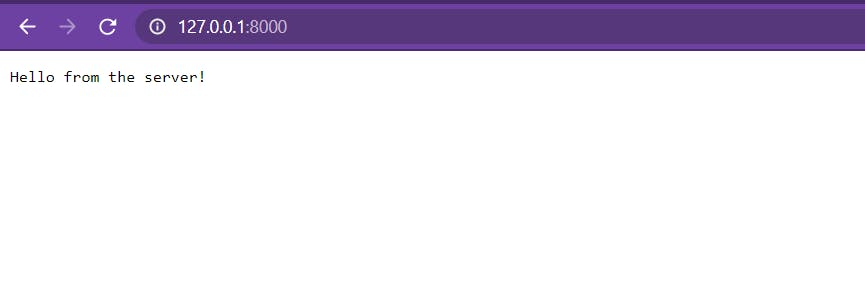
Yay! Our server is up and running as expected!
We see that our callback function inside createServer() has been called when we opened our server (which is essentially a url request) through an event which was fired. In our terminal, we observe that the application is still being run and to close it, we use Ctrl + C (even on iOS).
Resources for You 🎁
Because you reached till this point of the article, I've got some resources listed out just for you!
Remember, everything is just a Google Search away!

Phew! You've reached the end of the article! 🎉 Thank you for hanging about. Hope you enjoyed this post and learned something 😇 Please do leave your doubts (if any) and feedback in the comment section. Stay tuned for the next post! 👾🚀